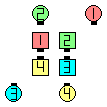
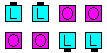
From a 2 x 4 (or other applicable formations) with precisely two Leaders
in each Line.
In the following diagrams, designates the Leaders in each Line as
 designates the other dancers.
The dancers designated bycan be
facing in any direction other than the same direction as thedancers in their 1 x 4.
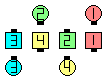
designates the other dancers.
The dancers designated bycan be
facing in any direction other than the same direction as thedancers in their 1 x 4.
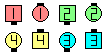
| |

| |
| |
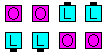
| Leaders in a
R-H Wave setup... | | a L-H Wave setup... | | a R-H 2FL setup... | | a L-H 2FL setup. |
|
- Checker Board anything:
- The Leaders in each Line (dancers) Trade with each other
as the others do the anything call working in a distorted 1 x 4.
Ends in a 2 x 4.
- Checker Box anything:
- The Leaders in each Line (dancers) Trade with each other
as the others do the anything call working in a distorted 2 x 2.
Ends in a 2 x 4.
Note: The others (dancers) in the above diagrams may be facing
any direction. If there are more than two Leaders in Lines, the caller must
specify who will Trade by saying 'Prefer the anyone to Trade,
all Checker Board | Box anything'.
Hint: dancers who do the Trade can help the other dancers by precisely
doing their Trade and then identifying the adjacent vacated positions by
pointing to them.
Note: Checker Board | Box is often taught as: Leaders Trade as
the Others move into the Center and make the given formation
(a 1 x 4 if Checker Board, or a 2 x 2 if Checker Box),
do the anything call and then get back to the vacated
spots. As dancers, we prefer to do the anything call working in a
Distorted Column | Line | Wave | Box. That is, try to stay on the original
spots and only move off them if necessary. For example, from Parallel L-H
Waves, if the call is Checker Box Cross & Turn, the Trailing End (Belle) would
simply U-Turn Back instead of move into the Center, make a Box, U-Turn Back,
and Veer out to become an End.
|
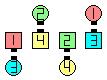
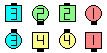
Checker Board Dixie Style To A Wave

| |
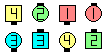
| before
Checker Board
Dixie Style To A Wave | | after
Leaders in Lines Trade
as Others Distorted Column
Dixie Style To A Wave (done) |
|
Checker formation anything [C4] (Vic Ceder):
Leaders (who must be in Lines) Trade with each other as the others do
the anything call working in a distorted formation. The
designated formation is a 4-dancer formation such as a Diamond,
Single 1/4 Tag, or "Z". Hence, Checker Board could alternatively be
called as Checker Column, Checker Line, or Checker Wave.
|
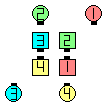
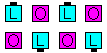
Checker Diamond Cut The Diamond
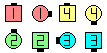
| |
| before
Checker Diamond
Cut The Diamond | | after
Leaders in Lines Trade
as Others Distorted Diamond
Cut The Diamond (done) |
|